Contact forms are one of the most effective ways of generating leads on a website. In the new SALESmanago Express PopUp designer, you can design clean, eye-catching pop-up contact forms quickly and easily.
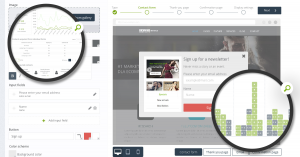 It goes like this: each anonymous contact who submit a contact form is saved in your CRM database as a monitored contact, letting you track their behavior – subsequent visits, interests, time spent on the website, and so on. Over time, each monitored contact’s behavior profile becomes more complete, which allows you to create more effective automation processes.
To begin creating a new contact form, go to Generate Leads → choose the contact form type: Pop-up → click Create new +
.
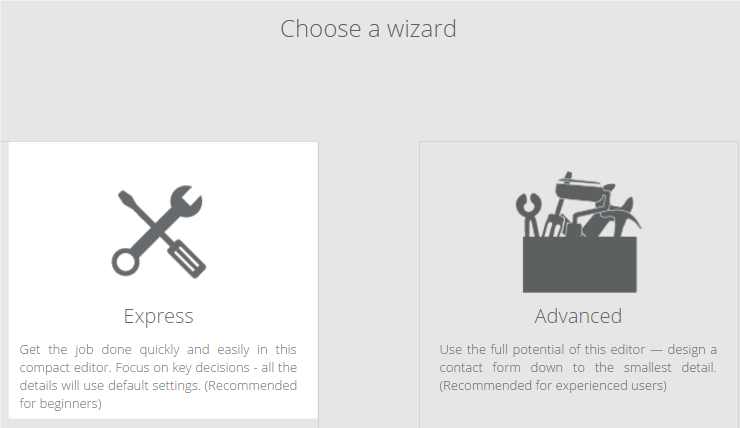
At this point, you can choose which form building tool to use. Click the Express builder.
A pop-up contact form in SALESmanago consists of 3 elements:
- the form itself, with fields to be populated with details of people visiting your website,
- a thank you page to appreciate contacts who submit the form,
- an email with a link that confirms subscription (+ optionally, a short confirmation message informing contacts that they successfully subscribed).
.
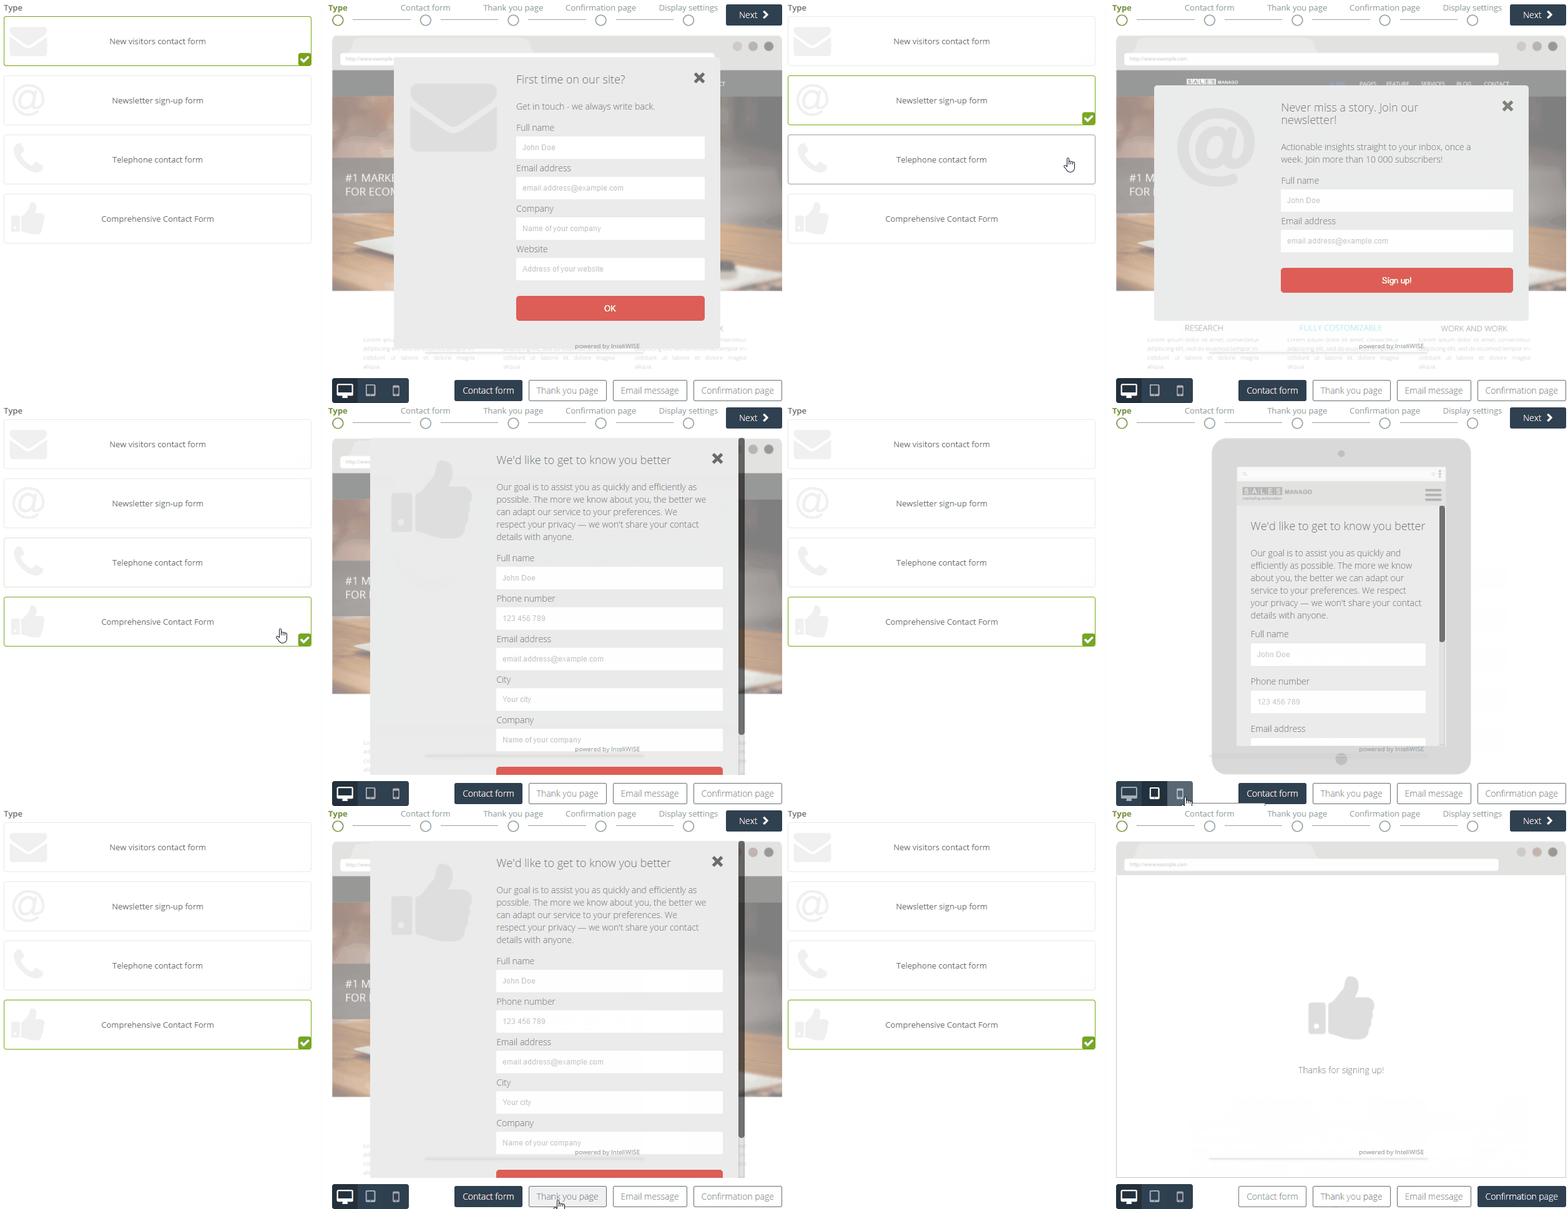
CHOOSING A FORM TYPE
You can choose from 4 ready-to-use content templates.
THE FORM
The form is where users can enter their details, but it’s also the place where you greet them and make a first impression. When someone submits a form, the entered details go to the contact database in your CRM and are formed into a contact card.
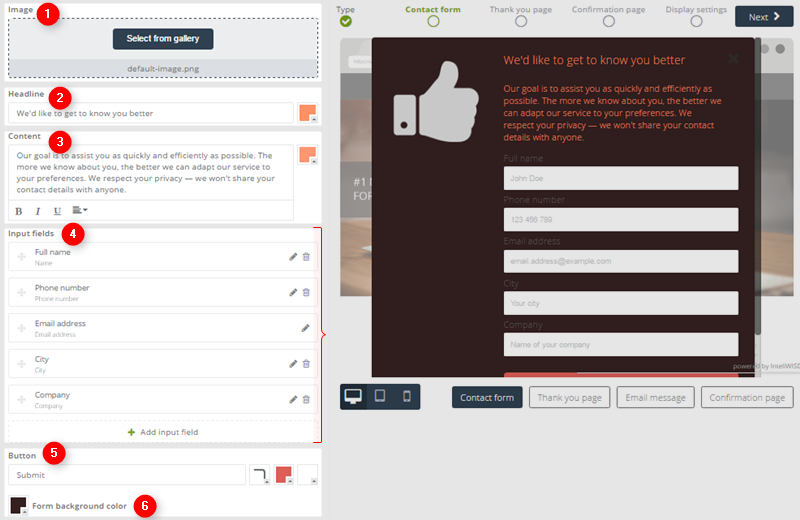
[1] Image – the graphic on the form. You can use the default one provided in the template, or add your own image from the gallery.
[2] Headline – the first line of text on the form, a title or opening sentence.
[3] Content – the main body of text in the form. Putting crisp, witty copy here will work wonders for your lead gen process.
[4] Input fields – here you can add, edit and remove the input fields of your contact form.
[5] Button – here you can specify the text, color, and shape of the Submit button.
[6] Form background color – use this color picker to change the color of the contact form’s window (the background layer).
THANK YOU PAGE
Contact details are valuable. It takes time, effort and trust on part of a customer to provide their contact details via a contact form. A Thank You page is a short message that expresses gratitude to people who go out of their way and give you their personal information. You can also inform your soon-to-be subscribers when and how you will be contacting them next.
CONFIRMATION EMAIL
SALESmanago supports the best practices of permission marketing. To make sure email addresses of contacts are valid and all contacts who enter your CRM database do so willingly, a double opt-in system is in place. When someone subscribes on your website, the system sends that person a confirmation email to the address provided in the contact form.
DISPLAY SETTINGS
It’s been a long time since pop-up stopped being just an annoying website element, mindlessly displayed to anyone regardless of their interests. Don’t make that mistake – Specify where, when and to whom you want this contact form displayed and automate tagging contacts who fill in the form.
Add tags to contacts – enter tags you want to be automatically assigned to contacts acquired via this form.
Mobile devices – include or exclude smaller devices (such as smartphones) from displaying particular contact form.
Identified contacts – if you want you can show a given contact form only to anonymous (unidentified) visitors or only to identified ones.
Moment of display – specify when during a visit should this contact form be displayed.
- site is scrolled xx% – the form appears after a person visiting your page scrolls the specified % of the site’s length, for example after reading xx% of an article.
- after x pageviews – the form appears after a person visiting your page enters or reloads a page on your website x times.
- after x seconds – the form appears x seconds after a visitor entered the website.
Display where – enter the URL of the website on which you want this contact form to be active and specify on which pages within the website you want it to be active.
- On all pages – the default setting, the contact form will be active on all pages within the website.
- Only on the main page – the contact form will be active only on the homepage of the website.
- URL contains – the contact form will be active only on those pages within the website, whose URL contains the specified phrase.
- URL does not contain – the contact form will be active only on those pages within the website, whose URL does not contain the specified phrase.
BENEFITS
- More contacts acquired from your website
- 200 % increase in the number of conversions on personalized contact forms
- More clicks on your web page and more returning users
- Significant decrease in bounce-rate
- Shorter time the user needs to retrieve required information
- Longer time the user spends on your web page
Learn how to make a pop-up that converts
and
Sea 5 good reasons to make a pop-up today
 Follow

