How could one open up new opportunities for preference-based advertising and add a human factor to communication by confronting raw data with the real needs of real customers? The answer is: by emphasizing zero- and first-party data. What are they? Why should you collect them, and how do you do it? Here’s our Supreme Guide that will help you bring more consent to your relationships with customers and multiply your marketing results.
This article is a continuation of Supreme Guide to Zero-Party Data: The What, The How, and The Why>>
Tools to collect zero-party data with the Customer Preference Center
Customer Preference Center allows you to use various built-in tools from the Customer Data Platform to collect information about consumers. You can freely combine and use them to get to know your audience even better.
Pop-up
Beautifully designed pop-ups can help you collect data for the Preference Center from anywhere on your site. You can adjust their display according to many factors, such as the content of the subpage, the user’s engagement with the brand, or their interests. The user who fills in the preferences on the pop-up does not even have to go to the Center landing page to confirm the provided information. However, they can update them at any time from the Preference Center.
Tool #1 Pop-up with quiz to collect Personal preferences on products
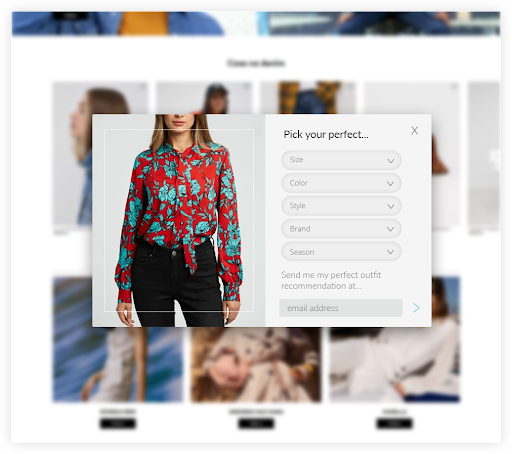
Prepare a pop-up with a short quiz that allows the user to choose the best product from the ones available in the store. Ask a few questions to narrow down their choices, and ask for an email address to which you will send the results (along with permission to send marketing content). The provided Personal data and Consents will be saved in the Customer Preference Center and on the contact card. Using automation rules, send an email with expert advice and suggestions for the best products based on the submitted information.
Examples of information you can collect:
- Color
- Style
- Size
- Occasion
Use Case Example:
Gather information about the favorite type of jewelry, preferred materials, shapes, styles, and types. On this basis, sort your user base and send them relevant content from your blog with recommendations of selected products.
Tool #2 Pop-up with question to progressively collect Personal data
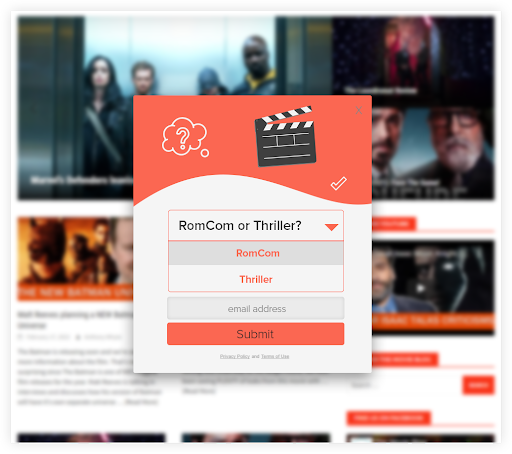
Instead of overwhelming your audience with lots of questions at once, break the process down into steps. Collect data in smaller batches and in the right context.
Prepare pop-ups containing a form to collect personal data with questions that are matched contextually to the content on the page. Ask one or two questions at a time to avoid overloading the users and always refer to the content they are viewing. Additionally, every 5 filled pop-ups, you can invite users to fill in the whole questionnaire from the Preference Center in exchange for a specific reward.
Examples of information you can collect:
- Prepare a flow where you’ll ask them to specify, for example:
- Favorite travel destinations
- Traveling budget
- Favorite activity
- Preferred traveling season
- Company (size and age of companions)
- Dietary requirements
Use Case Example:
With each piece of information you gather, you can provide even more personalized communication and offers. In your regular newsletters, incorporate the given preferences and encourage the user to visit the Center and fill out additional information for even better tailored content.
Tool #3 Pop-up with a form to collect data for B2B offer
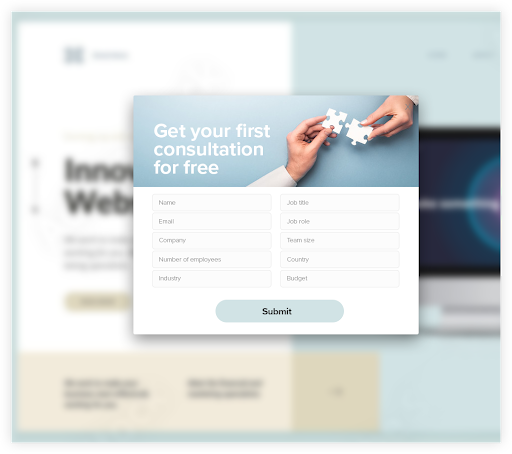
On a B2B website, use pop-ups to gather Personal data that will help you fine-tune the offer.
Prepare a professional-looking pop-up containing a form with questions about relevant details. Display it on the micro-conversion sub-page of the offer inquiry, or the page from which people most often go to the main micro-conversion page. Collected data will appear on the contact card, so you can prepare an even better offer without bothering the user with additional questions.
Examples of information you can collect:
- Company name
- Number of employees
- Industry
- Job title
- Job role
- Team size
- Country
- Salary
- Experience level with your products
- Budget
Use Case Example:
In B2B commerce, gather customer information such as industry, company size, spending budget and monthly demand for your products. Prepare a professional looking bid that includes the provided information. Then reach out with offers across various channels.
Tool #4 Pop-up with question to engage users while collecting Personal preferences
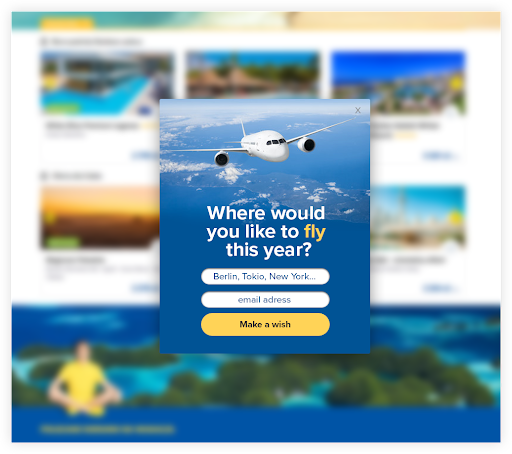
Engage users on the website using gamification.
Display pop-ups in different locations with questions about Personal data. Reward users for answering by sending an email with a code snippet to unlock a special prize. The email should also contain a hint as to where the next pop-up can be found. Use the collected information to complete the customer profile and personalize future actions.
Examples of information you can collect:
- Face shape (article with style tips for eyeglasses)
- Type of work (article about types of glasses)
- Whether they use contact lenses (article comparing contact lenses to glasses)
- Hair color (look book for the upcoming season)
- How much time they spend outdoors (article on how to prevent glasses from fogging up)
Use Case Example:
Prepare a series of questions to get to know your customers better with an incentive and match them with blog articles. Display pop-ups to users who read the articles. After completing each pop-up, send a message letting the user know how many answers they are missing to receive the reward. Then, encourage them to find more pop-ups while reading articles.
Landing page
A landing page is a dedicated space containing a beautifully crafted Preference Center. It can contain one or more tabs, and its appearance can be personalized as needed. Available tabs are:
- Product preferences,
- Personal data (Primary information and Personal preferences),
- Consents,
- Channels & Frequency.
How do you get the most out of them?
Tool #1 Landing page to collect Product preferences
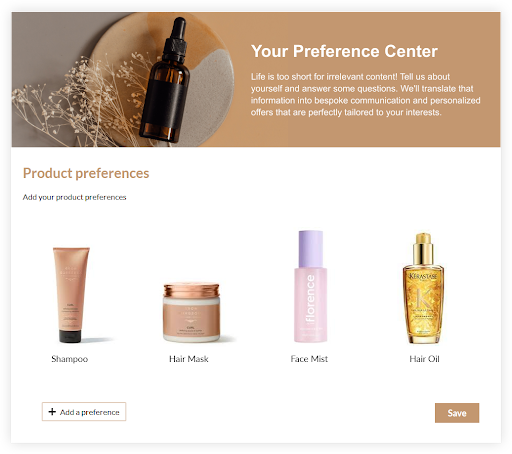
Prepare a Preference Center containing only one tab: Product preferences. Add a space where you display suggestions of interesting products using an AI-based recommendation scenario. Redirect users from the website to the Preference Center landing page and encourage them to choose what interests them from this selection. Collect data that will help you make even more personalized recommendations.
Examples of information you can collect:
- Apparel
- gender
- color
- item type
- brand
- price
- Beauty
- purpose
- age
- activity
- allergies
- brand
- scent
- health concern
- Travel
- country
- vacation type
- organization
- diet
- budget
- accommodation
- Finance
- loan value
- length of loan
- loan insurance
- other loans
- B2B commerce
- industry
- stage of production
- purpose
- volume of production
- brand
- budget
Use case example:
Prepare an email with personal recommendations. Here, you can display product recommendations according to the scenario Products based on contact preferences. Then, send it to those who filled out this tab along with an incentive to visit the site. This way, people who are interested in green jeans for women, costing less than €200, will see exactly these types of products.
Tool #2 Landing page to collect Personal preferences on products
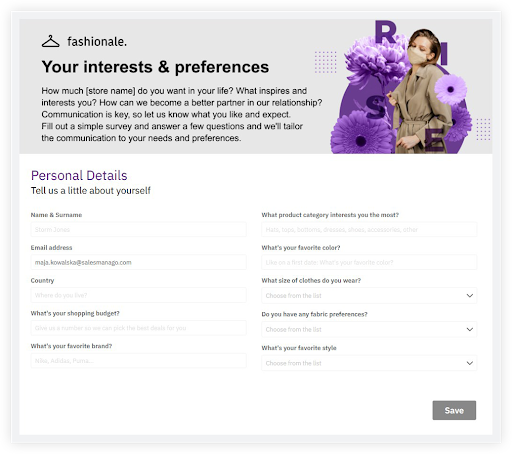
Welcome new users to your site and get to know them better early in a relationship.
On the login page, place a banner redirecting to the Preferences Center with one tab: Personal data. Put a questionnaire asking for basic information about the users, their habits, and preferences. Use the data to do some initial segmentation of new users. Give thanks for completing the survey by sending expert advice tailored to one or more of the stated preferences immediately after completing the survey as instant gratification.
Examples of information you can collect:
- Country they live in
- Budget for shopping
- Favorite brand
- Product category
- Favorite color
- Clothes size
- Shoe size
- Favorite fabric
- Personal style
- If they have kids
- Number of kids
- Age of kids
- Top interests
- Hobbies
- Allergies
- Allergy types
- What kind of pet they have
- Pet breed
- Pet name
- Dream vacation destination
- Preferred vacation type
- Dietary requirements
- Loan purpose
- Loan value
- If they want loan insurance
- If they have other loans
- Preferred payments frequency
- Interest rate per year
Use Case Example:
Send a free trip preparation checklist to help a contact travel with children ages 3-4 to Germany. This is based on a contact indicating that they have children, provided they’re ages and wishes to visit Germany.
Tool #3 Landing page to collect marketing consents
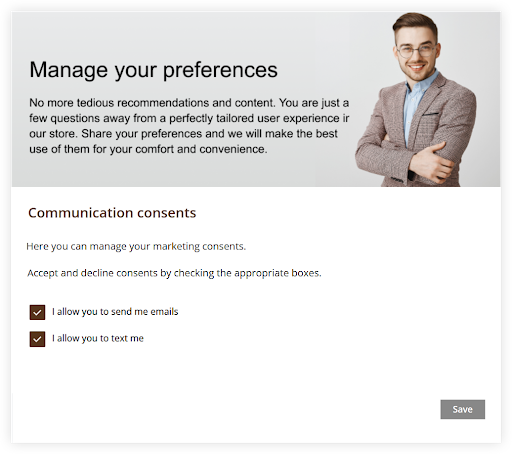
Allow customers to manage consents collected through any form within the site.
In a visible location on the page, place a redirect to the Preference Center with a Consents tab that collects all opt-in and marketing consents given by the contact. Make it clear that the contact can view and manage the list of consents at any time. You can further improve the user experience by adding a Channels & Frequency tab to the Center, so they can indicate when, at what time, and in what channel they prefer to receive messages.
Examples of information you can collect:
- Opt-in consents
- Email consent
- Text (SMS) consent
- Marketing consents
- Acceptance of Privacy Policy
- Consent for Sending Marketing Materials
- Consent for Third Party Marketing
- Preferred channel of contact
- Text
- Web Push
- Preferred frequency of contact
- Often
- Sometimes
- Occasionally
- Preferred days and hours for receiving messages
Use Case Example:
Prepare an email with educational content for users who expressed such desires. Mention the benefits of personalized communication across multiple channels, for example, discount and early access to promotions of interested products for Web Push channel subscribers. Invite them to give relevant consents in the Center.
Tool #4 Landing page to collect various types of information on customer preferences
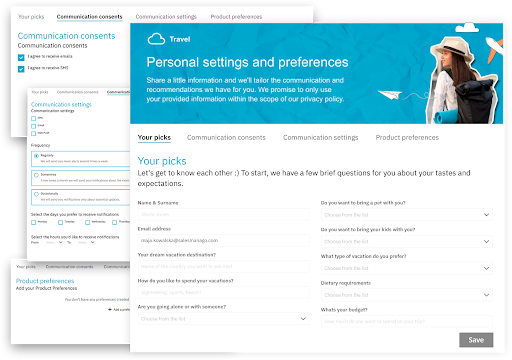
Make two-way communication your competitive advantage.
Redirect identified users to a personal preference dashboard: Center consisting of all 4 tabs that will give them full control over what their experience and purchase path will look like. Deliver on your part of the promise. Use the data collected in the Center to fully personalize communications across the indicated channels, show relevant recommendations, and match content to indicated preferences.
Examples of information you can collect:
- Product preferences
- narrow down groups of products a person is interested in, such as:
- pants
- blue clothes
- dresses
- items costing less than €100
- mortgages
- short-term loans
- hiking gear
- trainers
- living room chairs
- cat toys
- earrings with rubies
- narrow down groups of products a person is interested in, such as:
- Personal preferences
- customer’s likes/dislikes, needs, interests, requirements, such as:
- budget
- eye color
- hairstyle
- favorite coffee brand
- way they like their coffee
- major health concerns
- if they shop only for themselves
- most used night cream brand
- dream vacation type
- dominant style in their living room
- favorite article type
- favorite article subject
- a person that inspires them
- customer’s likes/dislikes, needs, interests, requirements, such as:
- Personal information
- Basic demographic information, such as:
- first name
- last name
- email address
- pronouns
- country
- city
- phone number
- Basic demographic information, such as:
- Marketing consents
- all the marketing and opt-in consents (new and old ones), such as:
- text (SMS) opt-in
- Web Push opt-in
- Consent to receive the newsletter at the provided email address
- Consent to processing personal data for the purpose of promoting services and goods, including email commercial information
- all the marketing and opt-in consents (new and old ones), such as:
- Communication preferences
- exact information on where, when and how often a person wants to receive messages, including:
- preferred channel
- preferred frequency
- preferred time of the day
- preferred day of the week
- exact information on where, when and how often a person wants to receive messages, including:
Use Case Example:
Based on the provided preferences, prepare a communication that takes the given information into account. For example, tailor an email campaign to the preferences of a fan of weekend ski trips to Switzerland who agreed to receive marketing communications and email offers and likes to read them every Saturday morning. Fill your newsletter with the best places to go in the upcoming time period. Keep them posted on important travel deals for flights from the country they live in to Switzerland. Keep the email design in the style of the morning news. Include recommendation boxes with products that interest the reader. Be specific and timely. After all, you see each other every week over Saturday morning coffee.
Email marketing gives you tons of options for targeting and personalizing your messages. You can use this channel to collect customer information in your Preference Center.
Tool #1 Email plus landing page to collect various types of zero-party data
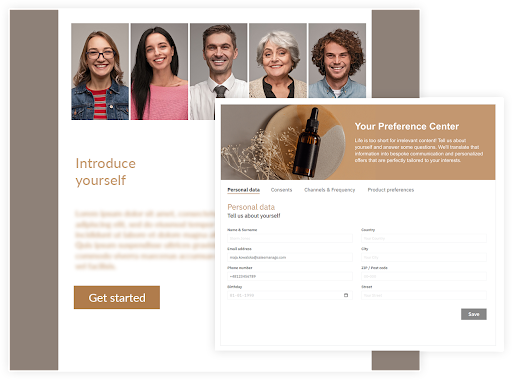
Invite all users to enter a new level of relationship via email. In the message, provide a link to the Customer Preference Center with all four tabs and let them know that from now on, they have full control over the data and marketing consent they provide. Add information that by using this link, they can both provide and update the data.
Examples of information you can collect:
- Update on given opt-in consents
- Update on given marketing consents
- New opt-in consents in different channels
- New marketing consents
Use Case Example:
Prepare three messages for people who subscribe to one channel: email, text, and Web Push. Send prompts to encourage people to visit the Preferences Center and update their opt-in and marketing consents based on their preferences. Add a link redirecting them to the Center with a Consents tab where recipients will be able to check and adjust their consents. When creating the tab, in addition to the type of permission, you can add a short incentive, such as the benefits of giving that particular consent.
Tool #2 Email with a discount plus landing page to collect Product preferences
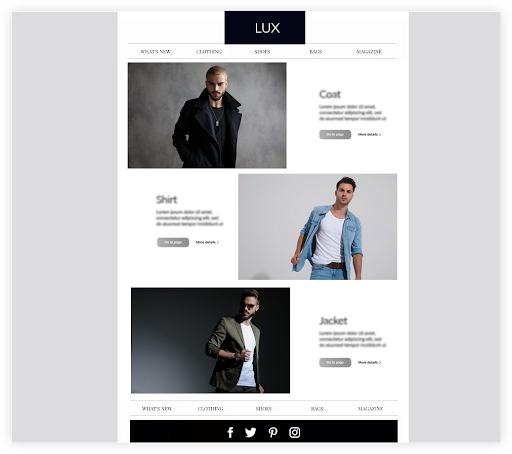
Increase CLV of customer groups that bring in medium to lower revenue. Use RFM segmentation to identify the right segment.
Prepare and send them an email directing to the Preference Center with one tab: Product preferences. In the message, explain that you want to get to know their needs better and, in return, offer a discount on future purchases for those who visit the center and submit their answers.
Examples of information you can collect:
- Type of product
- Purpose
- Using frequency
- Details related to the categories in your store, such as:
- price
- brand
- other subcategories
Use Case Example:
Use the Frequency|Monetary value matrix in the RFM Marketing Automation dashboard to find people who buy frequently and spend a lot in your store. For these promising segments, prepare a message inviting them to share their preferences. Redirect them to the Preference Center with the Product Preferences and Channels & Frequency tabs and encourage them to fill in their data. Use this information to send them ultra-personalized recommendations as often as they find comfortable.
Tool #3 Email plus landing page to collect communication preferences
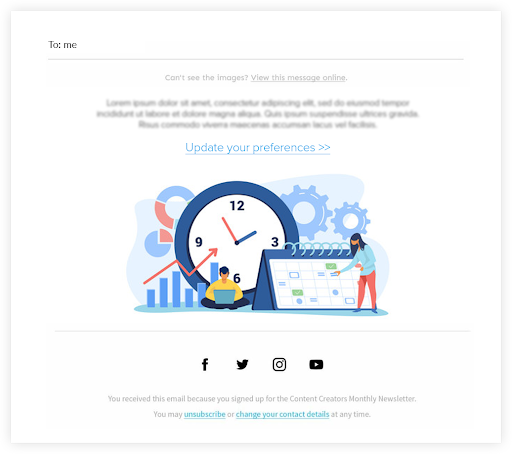
Activate dormant users.
Send them an email that invites them to specify their communication preferences. Include a link to the Center with the Channels & Frequency tab and encourage users to indicate their preferred channels, days, hours, and intensity of communication. Use this information to send them messages at the right time and in the right channel to increase engagement with the brand.
Examples of information you can collect:
- Update on preferred channels
- Indication of preferred messaging frequency
- Preferred day and time to receive messages
Use Case Example:
In the Segmentation Center, find people who have not opened the last 5 emails. You can additionally add the condition of low probability of purchase. Prepare a message letting them know that you’ve noticed their inactivity, and you can respect that. However, you would like to stay in touch, but on their terms. Invite them to indicate their Communication Preferences via the Center and provide a link directing them to the right landing page.
Tool #4 Email plus landing page to collect customer feedback
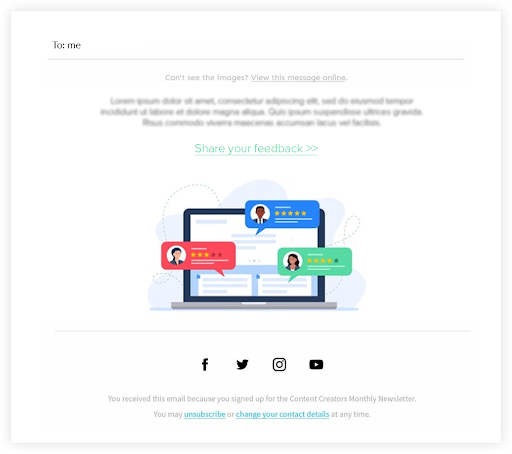
For people who already know the company and the product, prepare a survey, which will help to adjust and update the marked preferences from before.
Prepare a Customer Preference Center with a Personal data tab and use it to compose a feedback survey. Send an email with an invitation to complete it to every person who recently bought something from your store. Include the link to the Customer Preference Center landing page.
Examples of information you can collect:
- Main purpose for using a product
- Concerns about product/brand
- Changes after they started using the product
- Where they found out about the product
- Earlier experience with the product
- Reasons to choose the product
- Experience with similar products
- Ways of using the product
- Rating of the buying experience
- Rating of the cost-to-value ratio
- Challenges they are facing
- Likes/dislikes about the product
- Suggestions for features to add and improve the experience
- Willingness to recommend a product
- How satisfied are they with the product
Use Case Example:
Carry out a satisfaction survey with a shopping experience rating among people who have recently purchased from the store. Prepare a Preference Center with a Personal Data tab. Here, you can ask questions about their satisfaction with the purchase and the buying process. Set up an automation rule that will send an email to all people within seven days after their purchase. In the message, say thank you for the purchase and invite them to give you feedback. Include a link to the Preference Center. The information provided will be saved on the contact card, and you can use it in the upcoming correspondence to strengthen relationships and build customer loyalty.
Types of data in Customer preference center and how to collect and leverage them
With Customer Preference Center, you can collect all types of zero-party data and ask people anything relevant to your business. To collect specific types of information, you need to select the appropriate option in the first step of the Customer Preference Center wizard.
Product preferences
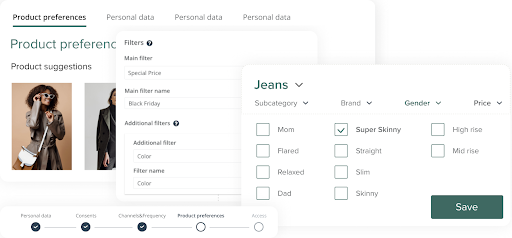
Product preferences is a set of criteria for a contact to determine which groups of products from your offer interest them. You can further use them to create product recommendations. The more data you collect, the better you will understand the interests of your contacts.
Criteria are directly correlated with the information pulled from the product feed (XML). The structure of product preference filters is similar to search filters in the online store. The main filter will be the primary criterion by which contacts will express their preferences, and additional filters will help narrow and specify them.
Tip #1 Help people see more products they really want
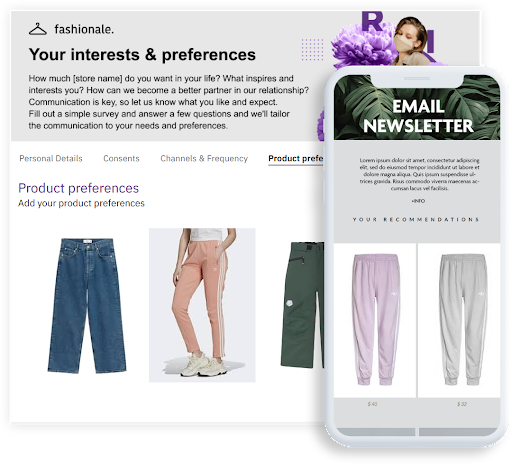
Send users an email with a link to the Center using the Product preferences tab. Ask users to indicate their preferences for desired clothing items, color, and cut, and also to indicate if they want to see discounted products. On this basis, build recommendations that will really increase sales in the store. This is because each recipient will only see what interests them within their price range.
Tip #2 Extend customer insights beyond website behavior
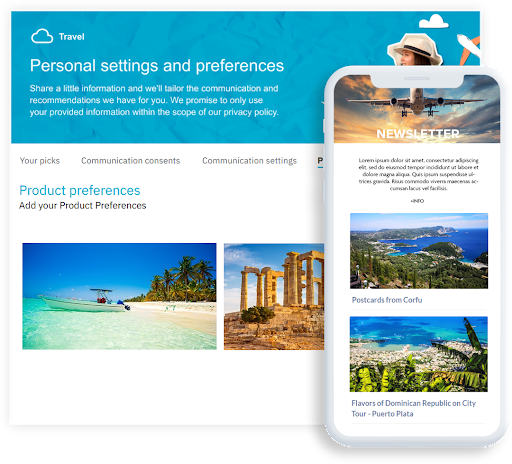
Instead of building foreign travel recommendations based on click-throughs, ask users via the Customer Preference Center landing page to indicate their preferred destinations, vacation type, and budget. Add to this the information about the customer’s loyalty to the brand and use it to prepare offers including favorite destinations, loyalty discounts and upselling with additional attractions according to the customer’s wishes.
Tip #3 Make B2B offer preparing as easy as one-two-three
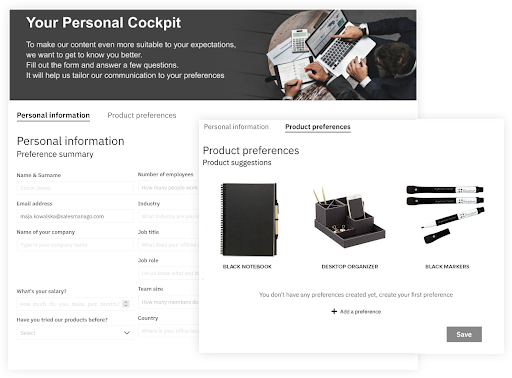
Prepare an advanced B2B product offer for complex customer office needs by collecting product preferences in various categories.
Use the Customer Preference Center landing page as a pre-offer interview. Prepare a Center with two tabs: Personal data and Product preferences. In the first tab collect information about the company, its needs and budget and complete it with Product preferences. Find out how big the company is, which equipment it requires, how much they can afford to spend, and how they will use it.
Tip #4 Adapt the language of your messages to the needs of your audience
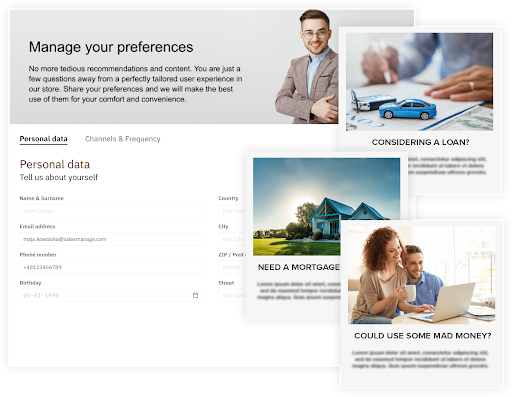
In a finance-related B2C online business, redirect website users to a Center landing page where you collect their preferences for financial products. Use this information to personalize communications based on shared preferences. Adjust the language, so it addresses the needs of specific individuals. Differentiate the tone of communication for people looking for mortgages, insurance, quick loans and debt consolidation. Vary your vocabulary and arguments to appeal to the different needs of your prospects.
Tip #5 Help people to select product preferences
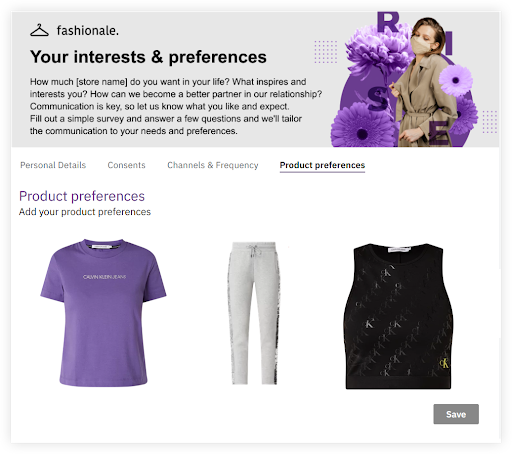
On the Landing page with Center using Product preferences tab display them the products from the store according to the selected recommendation scenario. This way, even if people are not sure what they are interested in, they can find inspiration and common ground for products that appeal to them.
Personal preferences and Primary information (Personal data)
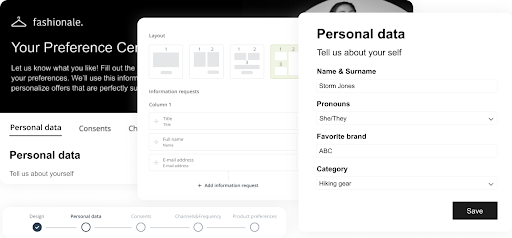
Personal data is information provided by contacts in the form of answers to all kinds of questions presented in this section. You can ask a number of different questions relevant to your business, such as age, shoe size, favorite vacation spot, or dog’s name. The more you ask, the more detailed the information will be to help you to get to know your contacts better.
Tip #1 Pre-segment your contacts using their personal preferences to make better recommendations
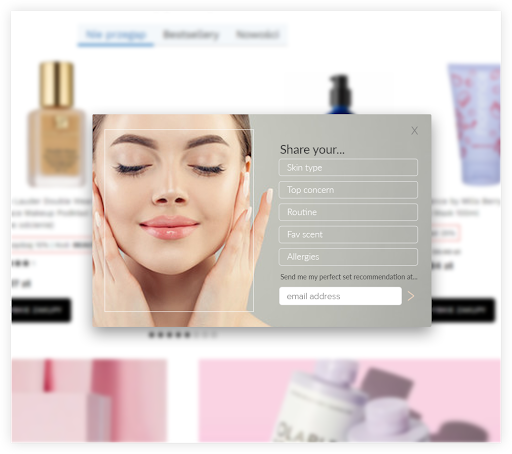
Prepare an attractive pop-up with a quiz. Put up to 5 fields with simple questions that will allow you to initially assess which products from the assortment will be the most suitable for the user. Inform the user about the benefits they will get in return for answering the questions. For example, it can be personalized expert advice or a special discount on selected products. Remember to include a section for the user’s email address, to which you will send the quiz results.
Tip #2 Use zero-party data to select the best lead nurturing cycle
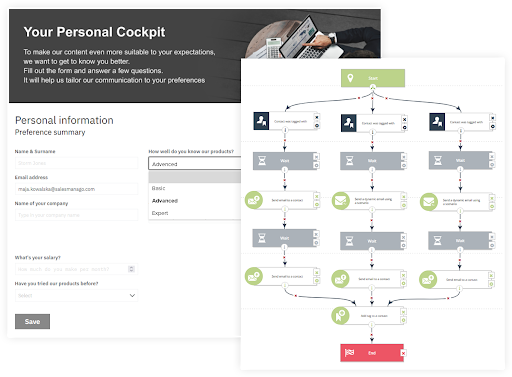
Prepare a pop-up collecting Personal Data to find out if users have already interacted with the product, have been using it for a while, or are just getting started. Use this information to tailor your content based on how advanced users are in their knowledge of the product. Set a Workflow launching one of the three lead nurturing cycles: Basic, Advanced, or Expert, triggered by the information provided in the Customer Preference Center. This approach allows you to shorten the path to purchase for different types of customers and build better relationships with them.
Tip #3 Use zero-party data to recommend the most relevant content and products
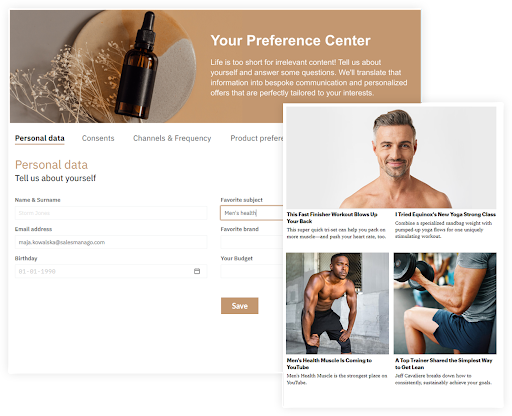
On your website, place a banner encouraging people to share their main interests. Use it to redirect people to a Customer Preference Center landing page that gathers accurate information about user needs through the Personal data tab. For a beauty store, this could be skin type, preferred routine, allergy information, and skincare goal. Using this, send them referrals for expert articles on these topics. In the articles, you can include relevant banners with sets of products that match the given criteria.
Tip #4 Increase revenue by inviting users to flash sales of their favorite brands
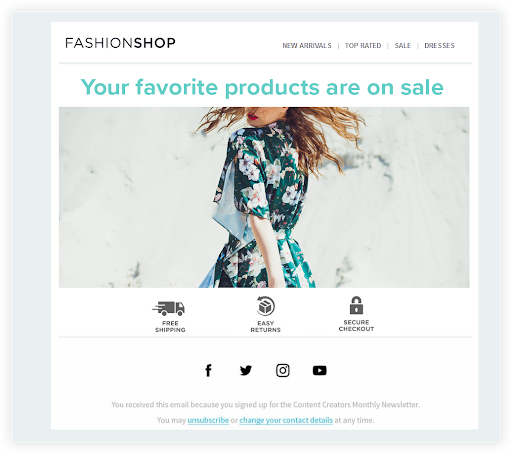
Send an email saying “You are one step away from joining exclusive, brand-specific flash sales!” Add a link to a Preference Center that collects Personal data, specifically your audiences’ favorite brands and designers. Set up automated invitations to flash sales of products from these brands. To increase conversion rate, you can enrich this segmentation with information about clothing sizes and invite your audience to sales.
Tip #5 Master segmentation in a store selling one type of product
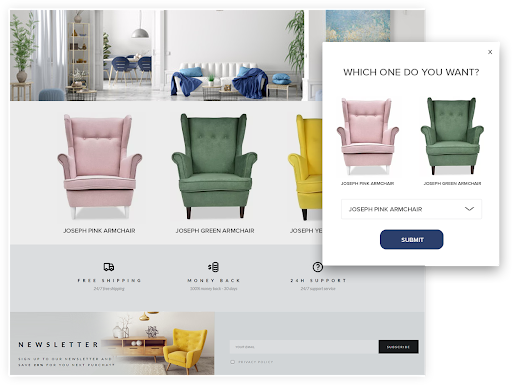
An interesting case is a store that sells only one type of product, for example, children’s linens. You can set a pop-up collecting Personal data to narrow down your preferred product criteria to give your contacts even better and more accurate recommendations. For example, you can ask about favorite patterns, colors, material, as well as sizes or used parts of sets. This allows you to better understand the needs of specific customer groups and send them customized newsletters with relevant offers.
Tip #6 Properly segment your B2B contact base even without an online store
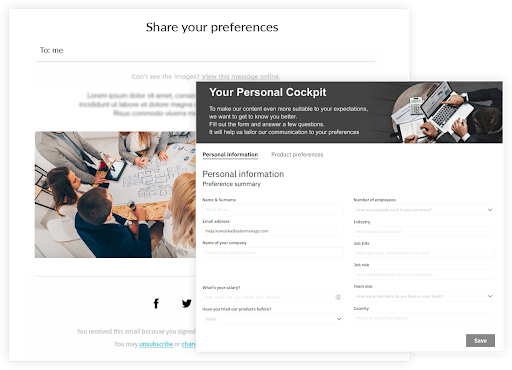
If you run a B2B business without an online store and want to improve the segmentation in your database, you can collect information in the Personal data tab. Send your contacts an email and invite them via link to the Center, where you’ll ask them questions about the preferred type of content. Then, using automation rules and the Contact has completed the key information event, automatically assign the appropriate tags. Once you sort the users, you can send them preferred content via email or Web Push notifications.
Marketing consents
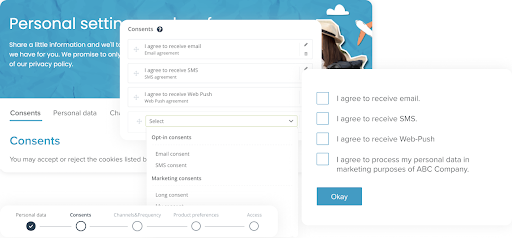
A marketing consent is a freely given, specific, informed, and an unambiguous indication of the type of communication a person wants to receive (and allows their data to be processed for that purpose). A person can check and manage all marketing consents given to a company at any point of their relationship. In this tab, you can ask customers to express, update and manage marketing (like GDPR compliance, consent to send educational, sales- or marketing-related materials) and opt-in (like email, SMS) consents given via the forms on your website.
Tip #1 Use insights on preferred channels to create unforgettable omnichannel experience
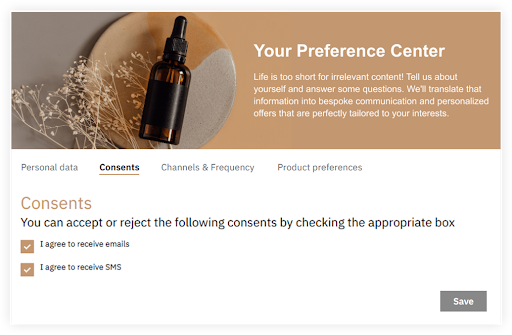
Run omnichannel campaigns for people who have agreed to receive messages across multiple channels. On landing pages with a Preference Center containing the Consents tab, collect information about channels in which the person agreed to receive messages. Based on possible combinations, create omnichannel campaigns using Workflow to provide your recipients with a complete experience and consistent communication on multiple levels.
Tip #2 Recover abandoned carts using the right channels
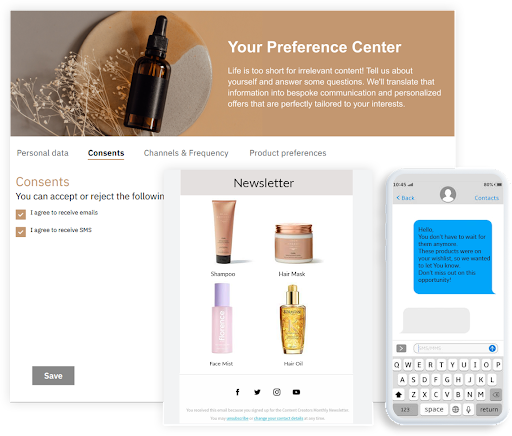
Using the landing page of the Center, collect updated marketing and opt-in consents. Using this data, prepare separate abandoned cart recovery scenarios for people who have agreed to receive messages in a single channel. Take care of beautifully crafted post-cart abandonment emails and texts to automatically send them to those who have only agreed to this type of message.
Tip #3 Get more marketing consents
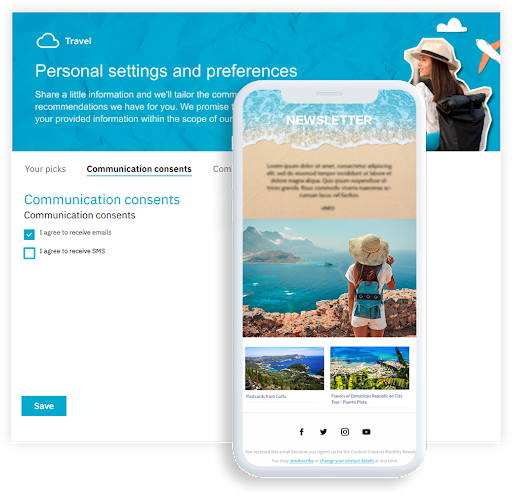
For people who opt-in for only one channel, show content and incentives to opt-in in other channels, so you can create a better omnichannel brand experience for them. For example, to all people who subscribe to your email newsletter but not the text messages, send an email showing amazing perks for subscribing to texts. Provide them with a link to a Preference Center with a Consents tab, so they can subscribe right away.
Tip #4 Respect user choices to get more marketing consents
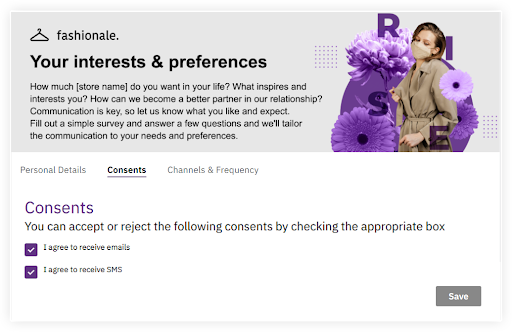
Expand the scope of consents. Start with educational campaign consents that allow you to send out educational materials in selected channels. Once you’ve built some trust, ask your contacts via email if you can occasionally send them a marketing newsletter and add a link to the Preference Center landing page. Use this mechanism to gradually increase the scope of your permissions, showing users that you’re not abusing their trust and that you’re only using consents for the purposes you agreed to.
Preferred channels and frequency
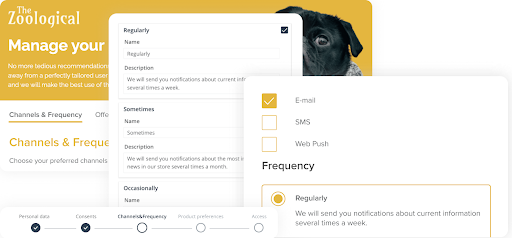
Channels & Frequency provide information that will let you know your contacts’ preferences for communication methods. Specifically, it shows their favorite marketing channel and messaging timing (day of the week and time range) and intensity (often, sometimes, rarely).
Tip #1 Always match the message content to the preferred channel
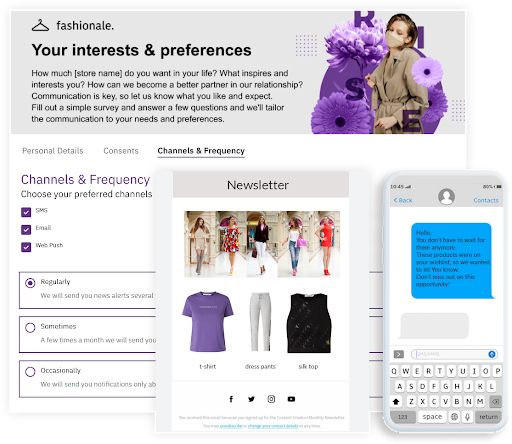
Redirect website users to a Customer Preference Center with a Channels & Frequency tab. Gather information on which channel a person would like to receive messages. Develop your communication strategies accordingly. For those who prefer text messages, choose a concise and specific style. Web Push notification devotees should be treated like Tapas consumers: tempting, colorful and bite-sized. For those who select email, prepare communications that are more conversational, elaborate, and strategically packed with incentives.
Tip #2 Use preferences to personalize the omnichannel experience
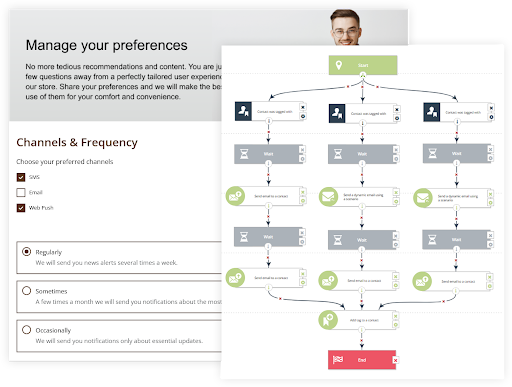
Redirect website users to a Customer Preference Center with a single tab (Channels & Frequency) and ask them to specify their communication preferences. For those who have indicated more than one preferred channel, create campaigns that seamlessly blend different types of messages. Remember to keep messages consistent and avoid unnecessary duplication. For example, you can use Web Push Notifications to inform users that they will find a special birthday offer in the mail.
Tip #3 Use email to invite users to a poll on preferred messaging frequency
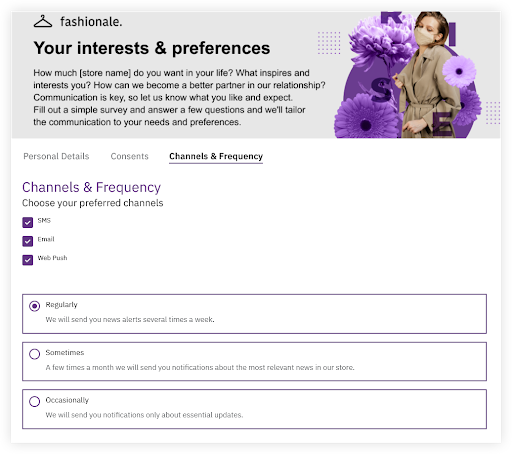
Through a link direct them to a Customer Preference Center using Channels & Frequency tab containing the Frequency section. Gather information about preferred communication frequency and use it to better engage users who are less active. For example, in your monthly newsletter, show that you have a special offer every two weeks on their favorite products and ask them to send you messages more often in their preferred channel.
Tip #4 Use zero-party data to customize newsletter styles, greetings and goodbyes for each user
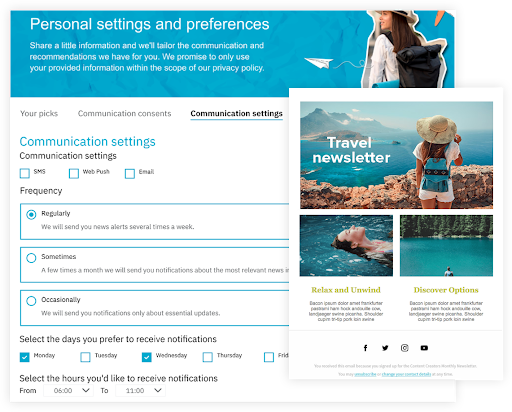
Prepare a landing page with a Customer Preference Center containing Channels & Frequency tab where you can gather information on prefered frequency and time of the day when your users want to receive messages. Encourage contacts to provide this information by sending them an email with a link, or redirecting them from the main page. Use this information to tailor the content of your emails. For early birds, create an informative newsletter with flash news that reads perfectly with their morning coffee, and for night owls, send deeper content for contemplation and reflection, on one specific topic. Enhance the personalization by matching your email greetings to users’ preferred time of day to receive messages (Good morning, Good afternoon), and your goodbyes to their preferred frequency (See you next week, See you next month).
Customer Preference Center from different angles
The Consumer Preference Center can consist of one, two, three or four tabs. You can mix and match them to gather information that is relevant and useful to your strategy. Additionally, you can collect data in several channels: directly through the Center, through pop-ups, and through emails. This makes it easy for you to adjust the pace and intensity of profiling according to the customer’s level of familiarity with your brand, engagement, preferred channels and the information they’ve already provided.
Wrap-up
There are plenty of ways to use Customer Preference Center to collect zero-party data. It will heavily depend on the strategy adopted and the type of business. The beautiful thing is that the data can be developed and collected in any direction, depending on how the business, product line, and customers evolve. It’s a great tool for informed and permission-based marketing. If you want to learn more, schedule a free 1:1 consultation and learn how you can use the Customer Preference Center in your business.
 Follow

